Phonemic awareness is becoming increasingly popular among literacy specialists at the elementary level. Understandably so as there is more and more research to suggest that phonemic awareness is a central key in learning to both read and spell. Yet so many of the traditional phonemic awareness activities done in a classroom don’t translate well to virtual learning that so many teachers find themselves in during this global pandemic.
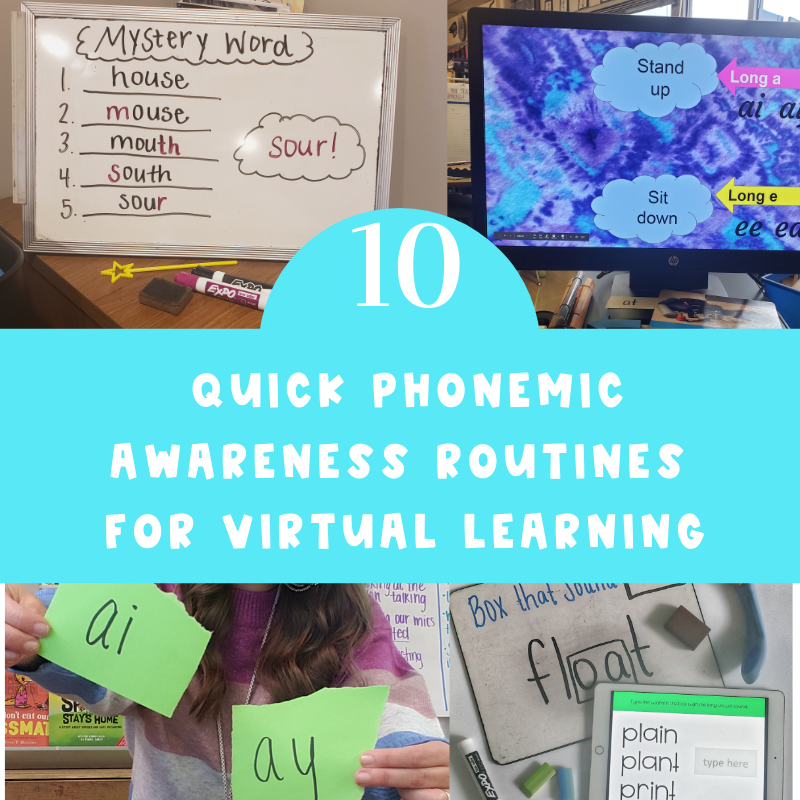
In this post, I will give you 10 quick and easy activities that promote phonemic awareness with students that can be carried out in a google meet or zoom lesson. Some of the activities can be done with a whole class, while others are best done in a smaller group. These activities will focus on quick routines that can be done in 4 minutes or less. If you are looking for more on virtual small groups, you can check out my blog post here about how I structure those lessons.
Please note that some of these activities may cross the line into a broader definition of phonics instruction. To be clear, phonemic awareness and phonics instruction can not be used as synonyms. Yet, with the conditions virtual teachers find themselves instructing in, I truly believe that sometimes overlap of the two areas is better than no instruction at all. Phonemic awareness refers to the ability a students has to focus on and manipulate sounds in words, whereas phonics instruction focuses more on which letters represent the sounds that are heard. These activities aim at focusing on the sounds students hear in words; yet, some do also use the grapheme, or letter, correspondence.
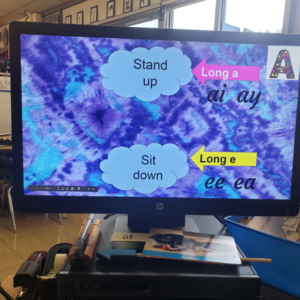
Activity 1: Stand Up/Sit Down
A super simple routine that can be done at the beginning, middle, or end of a lesson in less than two minutes. This activity has students focus on sounds they hear in a word. If they hear one particular sound, they stand up. If they hear a different sound, they sit down. I have done this with a variety of sounds including:
- Distinguishing long vs short vowels
- Rhyming vs non rhyming words
- Words that have the same medial sound or not
- Identifying different sounds such as sh or th
- Words that have the same onset
- Determining number of syllables in a word
Activity 2: First Sound Chat or Last Sound Chat
This activity focuses on students identifying the onset or final sound in a given word. If you have a smaller class, or are in a small group, this activity is best done if each student gets a chance to unmute and respond orally rather than in the chat. The use of the chat bar pushes this activity towards a phonics activity; however, if you have more than 20 students at a time like I do, having each child unmute for a turn is not an effective use of time.
For younger learners when playing first sound chat, the teacher can simply say one word such as “sad.” Students will type s into the chat bar. As students become more confident with their ability to identify the onset, the teacher can read a list of words: “sad, sat, sun.” Students will still reply with “s.”
For second and third graders, students can begin to identify the first sound that does not belong in a list. For example the teacher might say this list: “sad, sat, red, sun.” Students would identify the “r” as the onset sound that does not belong.
Activity 3: Monster Tap Phonemes
In this routine, students will use their hands as “monsters.” Students will show their monsters in the camera to show they are ready. The teacher will read a word such as “smash.” In the camera, students will tap one finger to their thumb for each sound they hear. In this example, students will tap one time for s-m-a-sh. Once they have tapped for each sound they will show their number of taps in the screen. For this example they would be showing a 4. Teacher then demonstrates how to monster tap and the correct answer then says “Monsters up.” Students put their monsters back on the screen and a new word is given.
Activity 4: Jamboard Word Sorts
Jamboards are a great way to get students interacting with words virtually. I make one jamboard of the sound sort I want the students to focus on. Then I make a copy for each student in the class by using the duplicate button. I label each page with a student’s name so they can quickly click the link, and scroll to their page. Students then complete the word sort the same way they would with word cards in person. To keep this activity more phonemically based it is best done with distinguishing sounds such as a long vowel sound where the words stay, lake, and main are all in the same long A column. However, it can also be used as a phonics activity identifying spelling patterns such as blends like spl, scr, and str.

Activity 5: Create a New Word
This activity can be done verbally, in the chat, or on a piece of paper. Here we focus on adding a phoneme to a give word to create a new word. The teacher will say a word, then say “add __ to the beginning.” To begin this routine, start by adding the same sound each time.
Example: Teacher: nap. Add s to the beginning
Students write, say, or type: snap
Teacher: lip. Add s to the beginning
Students write, say, or type: slip
After practicing adding the same sound for a few days, increase the difficulty by changing the beginning sound each time.
Example: Teacher: table. Add s to the beginning
Students write, say, or type: stable
Teacher: rail. Add t to the beginning
Students write, say, or type: trail
Activity 6: Delete a New Word
Delete a new word is played exactly the same way as Create a New Word, but instead of adding a sound, students will take away a sound from a word to make a new word. Just like with Create a New Word, increase the difficulty by switching the sounds the students are deleting.
Example: Teacher: slow. Delete the “s” sound
Students write, say, or type: low
Teacher: swish. Delete the “s” sound
Students write, say, or type: wish
Activity 7: Box that Sound
For this routine, I have students use a whiteboard and marker. Have the students label their board or their paper at the top and create a score box. Tell the students the top score in the game is however many examples you are going to give such as 7 or 10. Create a slide show ahead of time that has the examples you want to use on them. Put the words on the screen one at a time. Students will have 30 seconds to copy down the word they see on the screen. Then the teacher will say: “Put a box around the ___ sound.” Once the time is up, show the correct answer. If they were correct, they can put a tally in their score box and repeat until the end of the game.

When working on concepts such as vowel sounds and patterns, I have students follow up our game in class with independent work that focuses on finding the correct vowel sounds in words. You can find examples of my vowel digital word work that students use as homework practice here.
Activity 8: Letter cards
Students can use any piece of paper they have at home. Tell students to rip their paper into however many sounds you are working on. Label each sound card together. This could be done with so many different spelling patterns or sounds such as distinguishing vowel sounds, hard and soft c, the different sounds “ed” make, or with digraphs such as sh, ch, and ph. Have students place their cards in front of them. Read a list of words. As you read a word, students put their sound card in the screen. Start slow to build confidence, then get faster and faster as you go.

Activity 9: Give Me a # or Waterfall
Give me a # and Waterfall are great ways to practice rhyming and onset fluency. Give Me a # is for whole group when you do not have time for students to unmute; whereas Waterfall is meant for small groups. For Give Me a #, prepare your slides with the rime or rimes you want to focus on ahead of class. Project the rime so students can see the spelling such as “-ake.” Then the teacher will say “Give Me __” and a number. Students will make that many new words with a new sound at the onset. In this example if the teacher said, “Give me 5,” the student might write or type, “bake, cake, rake, make, stake.”
Waterfall is played the exact same way, but in a small group where students can unmute and share. You start with the student at the top of the screen and say a rime such as “-ame.” The first student gives a new word, such as “name,” then it goes to the next student until you reach the end.
Activity 10: Mystery Word
A favorite game of my students, which is heavily phonics based, but the root idea comes from phonemic awareness. This game has students change phonemes in words to create new words. The goal is to know the final mystery word at the end of the game, much like the old school game telephone. Have students number their whiteboards or paper with however many examples you plan on giving. Tell the students the first word. All students will write that word on number one. This is a good time to check that students spelled that word correctly so they feel confident to play. For the rest of the numbers, students will change just ONE sound in a word to create a new word. When you get to the end, students can show their mystery word or type it in the chat.

I hope you have found these 10 activities quick, useful, and easy to differentiate for your students needs. The important thing to remember is that all students benefit from daily practice with phonemic awareness so don’t forget to fit this important and crucial practice daily for your readers.

